How to Glue Lawn Mower Seat Back on? Remain mindful of the essential help to keep your grass shaper moving along as expected; A typical complaint from customers is a missing or free seat back. As well as being off-kilter, a seat that is too free or unstable may be hazardous.
You can without a doubt fix the rear of a lawnmower seat if you have the right stuff and supplies. Through mindfully following this quick and dirty helper, you will really need to fix a grass trimmer seat with the end goal that will persevere. Let’s read below about “How to Glue Lawn Mower Seat Back on?”
Table of Contents
Materials Needed:
Before beginning any repairs, gather all of your supplies. Things that are required include:
- Epoxy Resin or Adhesive: To join metal and plastic, use an incredible concrete or epoxy stick. Affirm that it is solid and impenetrable to the parts.
- Sandpaper: Surfaces can be prepared for holding with sandpaper of moving corn dinner, from coarse to fine.
- Cleaning Supplies: Use isopropyl alcohol or a fragile cleaning agent to clean the shaper’s edge and seat to keep them in fair shape.
- Clamps: You will need two clips to keep the seat ready while the glue dries.
- Protective Gear: Safeguard yourself from injury by wearing guarded stuff like prosperity glasses and gloves.
- Screwdriver or Wrench: To dispose of the seat latches, you’ll require a wrench or screwdriver, yet the specific instruments could balance beginning with one trimmer model then onto the following.
Step-by-Step Guide: How to Glue Lawn Mower Seat Back on
Step 1: Assess the Damage
Prior to making any trimmer fixes, examine the seat and its latches. Track down any flaws, as holes or openings, that can mull over holding process. Take care of any screws that aren’t absolutely necessary to account for additional screws.
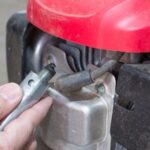
Step 2: Remove the Seat
Mindfully kill the trimmer seat from the machine by using a wrench or screwdriver. Make a point to grip the nuts and screws in the occasion you could need to replace them. Resulting to killing the seat, give the shaper edge a respectable wash to guarantee it is adequately unblemished to bond.
Step 3: Sand the Surfaces
Sandpaper roughens surfaces to set them up for holding. When applied to an unsavory surface, the paste supports the restricting. Beginning with a coarse coarseness and continually increasing it yields a more refined finish.
Step 4: Clean the Surfaces
Surface Cleaning Get rid of any sanding buildup, residue, or soil with a gentle cleanser or isopropyl liquor. This step is key for ensuring that the seat is securely joined to the trimmer edge.
Step 5: Apply the Epoxy Resin
If you will oversee epoxy glue or sap, read the packaging rules totally. Be careful to totally join the trimmings preceding applying the paste to any surface. Make use of the ideal sum; a great deal of will make a cheap wreck.
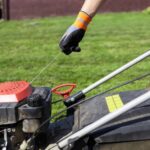
Step 6: Reattach the Seat
Make sure the seat’s mounting openings match up with the cutter casing’s first securing points for proper installation. Embed and fix the fasteners or screws to get the seat. Clasps might be expected to hold the seat set up while the paste dries.
Step 7: Allow Curing Time
Assuming no one really cares either way, be patient and do whatever it takes not to apply an abundance of strain until the seat changes; this could require several minutes. In case you accept your support ought to persevere, you need to believe that the concrete will set completely.
Step 8: Test the Seat
Gently press down on the seat to ensure that it is stable before the glue sets. Secure all hooks according to the power subtleties. Sitting on the seat allows you to evaluate the dependability of the cutter.
Step 9: Final Inspection
Attempt to check the proper locale for unexpected issues or weaknesses when the support is done. Verify there are no obvious breaks in the holding region and that the seat is unflinchingly fastened. The lawnmower seat can now be reattached using glue, it is fine to hope to be all.
Step 10: Preventive Maintenance
You should mull over covering or fixing the decent district to keep it away from crumbling. Eventually, this can go probably as a protect, safeguarding the relationship from things like moistness and UV radiation.
Conclusion:
With the right equipment, you can reassemble a yard trimmer seat that has broken into pieces. You can grow the presence of your grass trimmer and gain by anything fixes you make by checking out and staying aware of it reliably. I hope you like reading “How to Glue Lawn Mower Seat Back on?”

Barry, the expert behind LawnInspection.com, holds a Master’s degree in Horticulture and brings over 20+ years of hands-on experience in landscaping and lawn care. With certifications in sustainable lawn management, Barry is dedicated to providing readers with authoritative insights and practical tips for maintaining lush, healthy lawns. His extensive knowledge and commitment to excellence ensure that every piece of advice on LawnInspection.com helps transform your lawn into a green oasis with proven, eco-friendly practices. Connect with Barry on social media: Instagram and Facebook.