How to Fix Flat Tire on Riding Lawn Mower? Maintaining a tidy lawn frequently calls for a reliable riding mower. These strong devices might make lawn care easier, but they’re still mechanical, so they could malfunction at any second. Many people who own lawn mowers have experienced the frustration of a flat tyre. You shouldn’t be worried if your riding lawn mower gets a flat tyre. A few simple tools and some common sense will allow you to change a flat tyre and resume cutting grass.
If you own a riding lawnmower, you should read our detailed guide before you try to change a flat tyre. Everything from finding the source of the problem to replacing the tyre will be taken care of so that you may return to the pitch without delay. Let’s read below about “How to Fix Flat Tire on Riding Lawn Mower?”
Table of Contents
Tools and Materials:
You need to gather the required equipment and supplies before you can begin mending anything. Down below, you’ll find all the necessary details:
- Jack or Lift: Quickly remove the flat tyre from the mower using a jack or a lift.
- Wrenches: It is recommended to have a wrench set on hand in case the size differs from one mower to another.
- Pliers: Pliers can be used to loosen and remove fasteners such as cotter pins.
- Tire Repair Kit: This tire repair kit includes a tire patch set, rubber cement, and a brake lever.
- Air Compressor or Pump: You can use a pump or compressor to fill the repaired tire with air.
- Bucket of Soapy Water: Finding tire leaks is as easy as using a bucket of soapy water.
How to Fix Flat Tire on Riding Lawn Mower
Gather the tools and supplies you’ll need to change that flat tire, and I’ll show you how to do it.
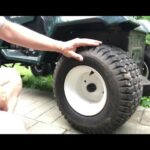
Step 1: Locate the Flat Tire
Finding out which tire is flat is the first step in changing a flat tire. Inspect each of the four tires for obvious signs of wear and tear, such as nails, screws, or sharp objects lodged in the rubber. If the hole isn’t immediately apparent, you might try using the soapy water solution to find the leak. You can find out where the leak is coming from by watching for bubbles while you soap the tire.
Step 2: Elevate the Riding Lawn Mower
Step one is to locate the flat tire; step two is to get the riding lawnmower up off the ground. Raise the mower using a jack or a lift to see if the flat tyre can spin freely. Tyre removal and repair will be a breeze if you follow this method.
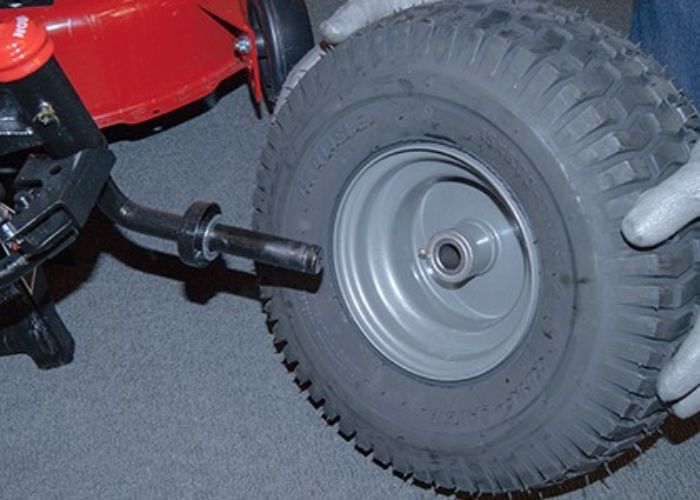
Step 3: Remove the Flat Tire
While the mower is elevated, use the right wrench to loosen the lug nuts on the flat tyre. Carefully detach the tyre from the axle without damaging the wheel or anything else around. Be sure to secure the lug nuts before reinstalling the tyre.
Step 4: Inspect the Tire
Before you remove the flat tire, make sure it is free of damage. Verify that the tire is uninjured and unobstructed by foreign objects. Make careful use of pliers to remove any foreign objects that may be present. If the damage is too bad to fix, you might have to get a new tire.
Step 5: Patching the Tire
You might use a tire repair kit to fix minimal damage, like a small hole or puncture. See the package for the kit for more specific instructions. To repair the damage, file it down, then fill the hole with rubber cement, apply a patch, and let it cure. A tight seal is formed, preventing any additional air from escaping.
Step 6: Plugging the Tire
Put a tire plug in your tire if something tiny, like a nail or screw, manages to puncture it. After using a reaming tool to clean the puncture hole, insert the tire plug. If there is any extra material around the plug, cut it off. This method is dependable and quick enough to repair even the most minute holes.
Step 7: Reinstall the Tire
Reinstalling the tyre is necessary after applying the patch or plug and finishing the repair. Tighten the lug nuts with a wrench and your hands once you’ve reattached the tyre to the axle. The vehicle will wobble if the lug nuts are not tightened evenly.
Step 8: Lower the Riding Lawn Mower
Using the jack or lift, move the riding mower until it is flush with the floor. Verify by looking that the repaired tyre is properly inflated and fixed once it’s on the ground.
Step 9: Inflate the Tire
To inflate the repaired tyre to the pressure specified in the mower’s instructions, use an air compressor or pump. You may usually find this data printed on the tire’s sidewall. The performance and life of your mower depend on you checking the pressure of the tyres.
Step 10: Test the Mower
Once you have inflated and mended the tire, you may put your riding lawnmower to the test. Go for a quick lap to check that the tire is inflated, hear for strange vibrations, and identify any problems with handling. Does your riding mower have a flat tire? Sure thing! You only corrected it! Great news if that’s the case!
Preventative Measures:
There may not be a foolproof method to avoid flat tires, but you can certainly lessen their impact:
- Regular Inspections: Check the lawnmower tires frequently for corrosion, wear or debris jams.
- Proper Inflation: Keep your tires filled to the correct pressure at all times. Flats and other damage are more likely to occur in tires that are underinflated.
- Avoid Hazards: Be very careful not to lose sight of the area you are cutting. Sidestep sharp objects and avoid areas where tires could puncture the pavement.
Conclusion:
One easy approach to save time and money is to fix the flat tire on a riding lawn mower. Keeping your mower in top shape and enjoying problem-free lawn maintenance is easy if you follow the steps in this comprehensive guide. Detailed instructions and recommendations for your specific mower can be found in the handbook. It is expected that you enjoy cutting the grass. I hope you like reading “How to Fix Flat Tire on Riding Lawn Mower?”

Barry, the expert behind LawnInspection.com, holds a Master’s degree in Horticulture and brings over 20+ years of hands-on experience in landscaping and lawn care. With certifications in sustainable lawn management, Barry is dedicated to providing readers with authoritative insights and practical tips for maintaining lush, healthy lawns. His extensive knowledge and commitment to excellence ensure that every piece of advice on LawnInspection.com helps transform your lawn into a green oasis with proven, eco-friendly practices. Connect with Barry on social media: Instagram and Facebook.