How to Break the Bead on a Lawn Mower Tire? It’s possible that you’ll need to perform routine maintenance, like changing the tyres, to keep your lawn mower running smoothly and effectively. Any grass care fan deserving at least moderate respect realizes that cuts and ordinary mileage can harm yard trimmer tires, so being the way to break the dot is a fundamental expertise.
You will learn how to break the bead on a lawnmower tire clearly and easily with this comprehensive guide. Let’s read below about “How to Break the Bead on a Lawn Mower Tire?”
Table of Contents
Understanding the Basics:
What does it mean to “break the bead”? Before we go into the stages, let me give you a little clarification. Dots are the deepest edges of tires that give a tight seal the wheel edges. To remove or repair a tire, you must first break the bead or disconnect this connection. This is the way to go if you’re changing tires, fixing a flat, or just doing routine maintenance.
Tools and Materials:
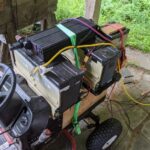
- Safety Gear: Eyeglasses and Work Boots
- Tire Irons: Several tire irons of various sizes
- Tire Bead Breaker Tool: Manual or Pressure driven
- Compressed Air Source: Complete Packed Air Blower with Every single Required Connection
- Jack and Jack Stands: Endlessly jack Cutter are a hitched couple who stand by their trimmer to get and raise it.
- Lubricant: Lubricant options include soapy water or lubricant for tyres.
Step-by-Step Guide: How to Break the Bead on a Lawn Mower Tire
Step 1: Safety First
Before you begin dealing with tires, ensure you’re wearing defensive stuff. Put on your security goggles to continue to fly items out of your eyes and your work gloves to shield your hands from scratches and wounds.
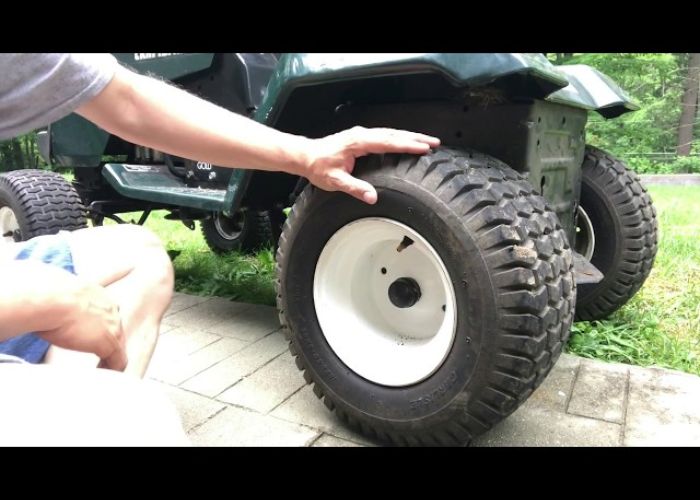
Step 2: Lift the Lawn Mower
Utilize the right jack to raise the lawnmower off the ground. Jack stands can be put underneath the edge to offer extra help. For the successful bead-breaking of tires, it is essential to maintain a risk-free working environment.
Step 3: Remove the Valve Stem Cap
Find the stem of the tire’s valve and eliminate the cover. This activity discharges caught air, which speeds up the dab breaking process.
Step 4: Deflate the Tire
Utilizing a tension measure, eliminate all air from the tire. This makes it simple to break the dot. To speed things up, push down on the tire to let air out.
Step 5: Position the Bead Breaker Tool
Push down on the tire’s sidewall while arranging the dot breaker instrument. Prior to utilizing a manual globule breaker, measure your tire size.
Step 6: Apply Lubricant
Tire grease or lathery water splashed along the dot are two choices. Breaking the dot turns out to be significantly more straightforward because of the reduced obstruction.
Step 7: Break the Bead
Break the Bead Simply press down on the handle of the tool to manually shatter a bead. Apply pressure consistently and, if necessary, use tyre irons to pull the bead away from the rim. See the handbook for directions on the most proficient method to utilize the water powered dot breaking device.
Step 8: Work Around the Tire
Break the dot in unobtrusive augmentations as you work your strategy for getting around the tire. Using tire irons to peel the bead away from the rim, completely loosen it up.
Step 9: Flip the Tire
At the point when you’ve broken one side of the globule, flip the tire over and rehash the cycle on the opposite side. Take as much time as is needed and be mindful so as not to harm the edge or tire.
Step 10: Inspect and Clean
As the tenth step, examine and clean up. After breaking the bead, check the wheel and tire for damage. Ensure the wheel well is perfect before you put on the new tires.
Step 11: Remove the Tire from the Rim
Utilize tire irons to completely remove the tire from the rim after breaking the bead on both sides. After you’ve tenderly worked your strategy for getting around the edge, take the tire off.
Step 12: Install the New Tire or Perform Repairs
Continuously follow the maker’s bearings while introducing another tire. Deal with any openings or penetrates prior to returning the tire on the wheel.
Step 13: Mount the Tire Back onto the Rim
Prior to putting one side of the tire onto the edge, ensure the globule is appropriately adjusted. Use the tire irons to gently press the other side of the tire against the wheel well after turning the tire over. Take precautions to avoid damaging the tire or puncturing the inner tube.
Step 14: Inflate the Tire
After the tire has been mounted to the wheel, inflate it by replacing the valve stem cap on top of it. Obtaining the recommended tyre pressure with an air compressor is the next step. To test for spills, run some lathery water over the dab region.
Step 15: Lower the Lawn Mower
Lift the lawnmower off the jack stands solely after you’ve affirmed it is steady.
Conclusion:
Breaking the bead on a lawnmower tyre, which at first glance seems impossible, is much more doable with the right tools and a planned approach. A crucial part of maintaining your lawnmower on a regular basis is inspecting the tires and replacing them as necessary. By adhering to this exact directions and valiantly taking on dab breaking position, you can make your grass cutter last longer and perform better. I hope you like reading “How to Break the Bead on a Lawn Mower Tire?”

Barry, the expert behind LawnInspection.com, holds a Master’s degree in Horticulture and brings over 20+ years of hands-on experience in landscaping and lawn care. With certifications in sustainable lawn management, Barry is dedicated to providing readers with authoritative insights and practical tips for maintaining lush, healthy lawns. His extensive knowledge and commitment to excellence ensure that every piece of advice on LawnInspection.com helps transform your lawn into a green oasis with proven, eco-friendly practices. Connect with Barry on social media: Instagram and Facebook.